Dithering
Image dithering for laser engraving
Dithering turns grey tones into a pattern of burn and no-burn dots, so a laser that only knows on or off can still show shading. Which pattern you choose changes how the engraving reads.
See the difference
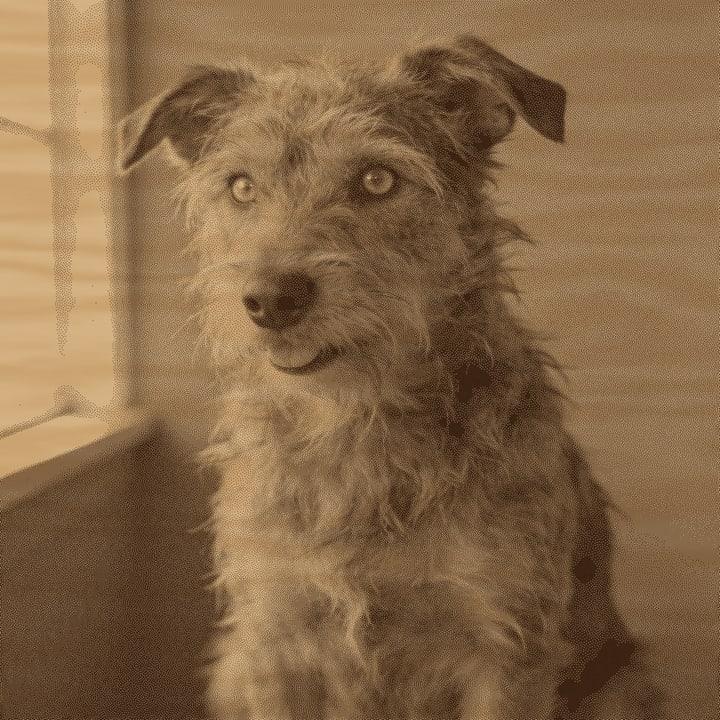
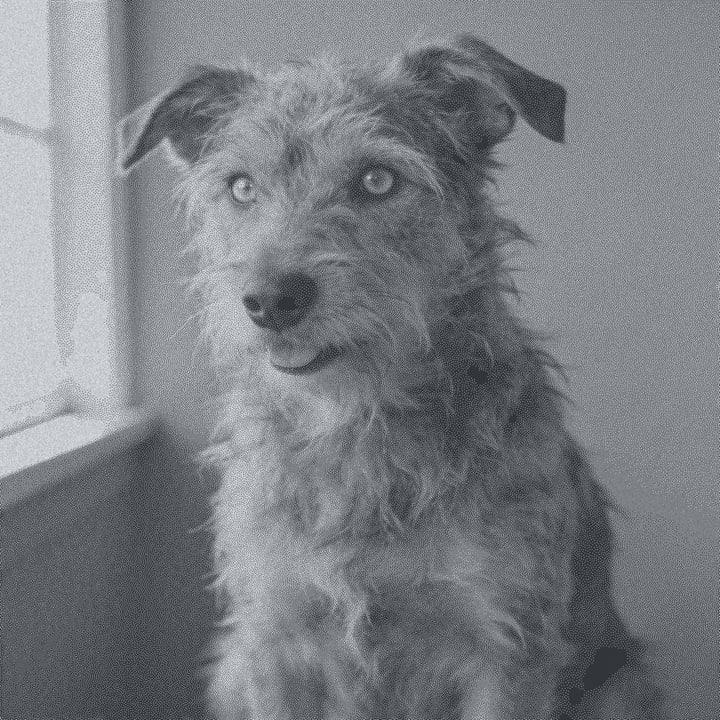
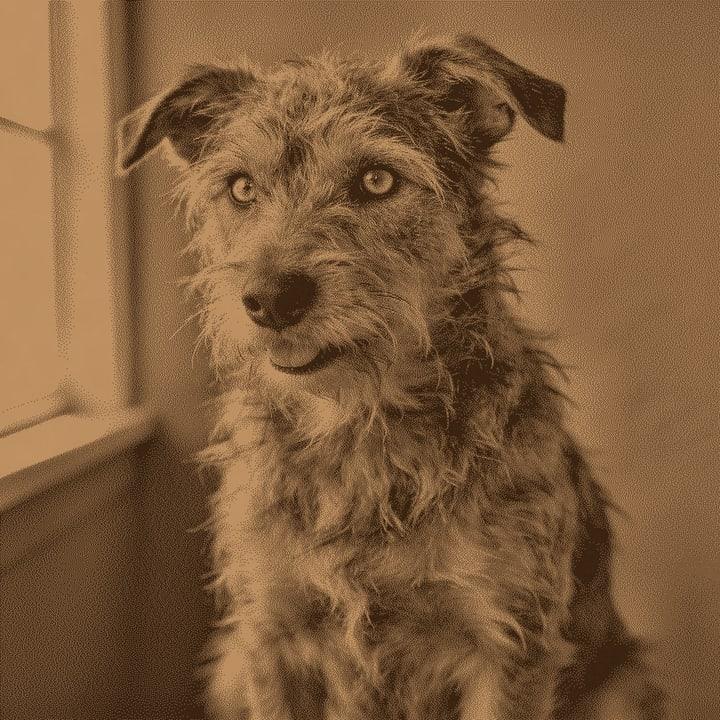
The same photo, prepared by our engine for wood three ways. Then every dither the app offers, with what it is good for.
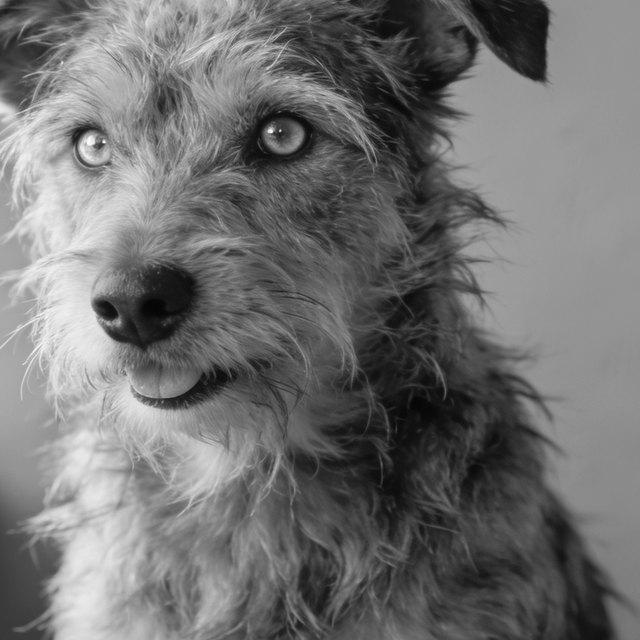
The photo 256 greys. A laser cannot burn this as is. 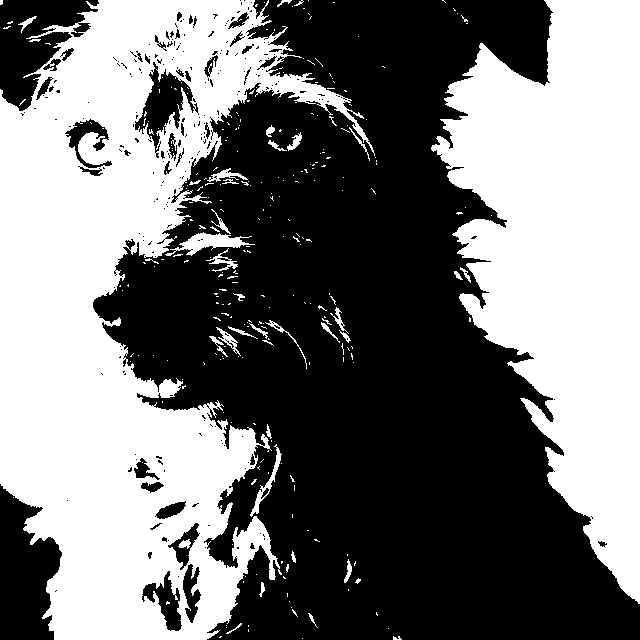
Threshold 50% Burn everything darker than mid grey. Tone is lost. 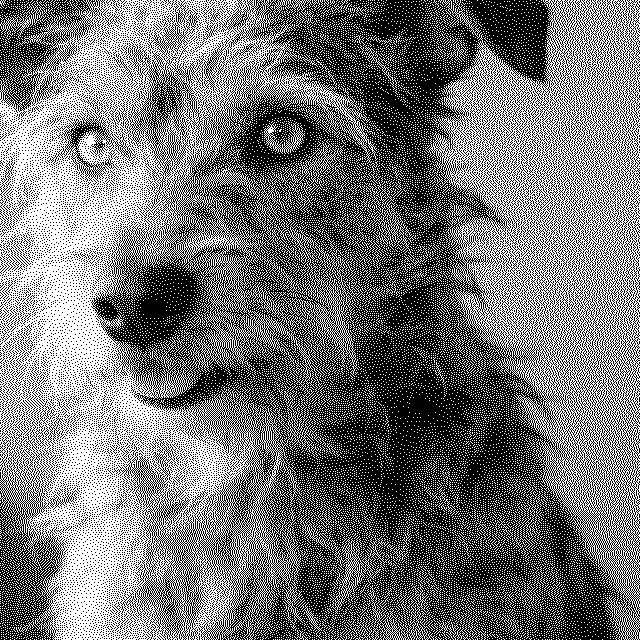
Floyd and Steinberg Error diffusion. Tone returns, with some streaks. 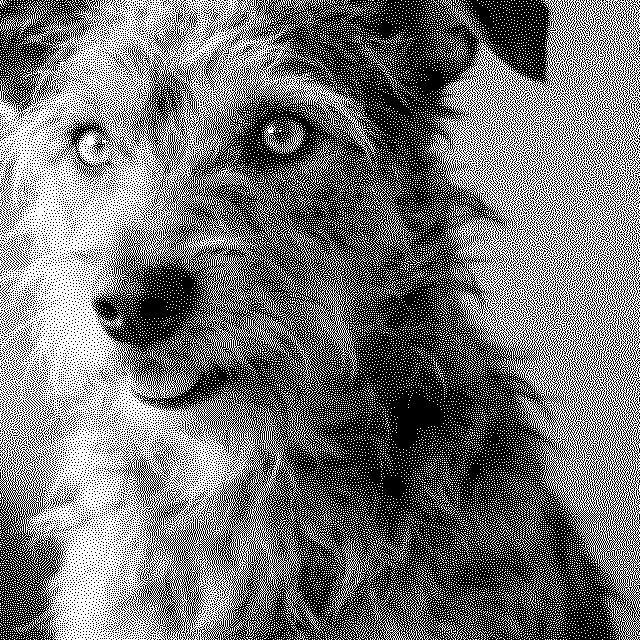
Ultra Dots placed to match the photo as closely as possible.
The wood preset at 640 × 640 dots, made by our engine. Zoom in: every pixel is burn or no burn.
All 13 dithers in the app
- Ultra (optimized)
- Best detail and smoothest tones. Takes a few seconds.
- No dithering (grayscale)
- For lasers with variable power (grayscale mode) or 3D engraving.
- Jarvis, Judice and Ninke
- Smooth and classic. Less wormy than Floyd and Steinberg.
- Floyd and Steinberg
- Fast and sharp. The classic.
- Atkinson
- High contrast with clean highlights. Loses some shadow detail.
- Stucki
- Very smooth gradients.
- Sierra
- Balanced, similar to Jarvis.
- Sierra Two-Row
- Lighter, faster Sierra.
- Sierra Lite
- Fastest error diffusion.
- Burkes
- Crisp with a slight texture.
- Bayer 4×4 (ordered)
- Regular cross-hatch pattern. Retro look.
- Bayer 8×8 (ordered)
- Finer regular pattern.
- Threshold 50%
- Pure black and white. Best for logos and text.
Why a laser needs dithering
In normal image mode a laser fires at full power or not at all. A photo is made of greys, so something has to decide which spots get burned. The simplest answer is a threshold: everything darker than 50% burns, everything lighter does not. On a portrait that throws away almost all the tone, which is why threshold files look like photocopies.
Dithering keeps the tone by changing how many dots burn in an area. More dots read darker, fewer read lighter. From normal viewing distance the eye blends the dots back into greys. The examples on this page show the same photo engraved on wood with a 50% threshold, with Floyd and Steinberg, and with our Ultra dither.
Error diffusion: the classic family
Error diffusion walks the image pixel by pixel. Each pixel becomes burn or no-burn, and the difference between what it wanted and what it got (the error) is pushed onto the neighbours that have not been decided yet. The kernels differ in how far and in what proportions they spread that error.
- Floyd and Steinberg spreads the error to four neighbours. Fast and sharp, the classic, but it can draw wormy lines in smooth areas.
- Jarvis, Judice and Ninke spreads it over twelve neighbours across two rows. Smoother and less wormy.
- Stucki uses the same reach as Jarvis with different weights. Very smooth gradients. It is the default on cork.
- Burkes is a lighter two-row kernel. Crisp with a slight texture.
- Sierra, Sierra Two-Row and Sierra Lite go from balanced (close to Jarvis) to the fastest diffusion.
- Atkinson only passes on 6/8 of the error. High contrast and clean highlights, but shadow detail drops out.
Ordered, threshold and grayscale
Bayer 4×4 and Bayer 8×8 are ordered dithers. Instead of spreading error they compare each pixel with a fixed repeating matrix, which gives a regular cross-hatch pattern. It looks retro and stays very even, which some people like on tiles and metal. Threshold 50% is pure black and white, best for logos and text, not for photos.
No dithering keeps the greys. Use it only if your laser and software engrave in grayscale mode with variable power, or for 3D engraving. If your software is set to threshold, a grayscale file will lose its tones.
Ultra: our optimized dither
Ultra is a Direct Binary Search dither. Instead of deciding each dot once and moving on, it keeps moving and swapping dots and checks whether the result looks closer to the photo, as seen through a model of the eye and the laser spot. It stops when no move makes it better. That takes a few seconds per image rather than a fraction of a second, which is why the app shows a quick preview first.
Ultra is the default for every material preset except cork, where Stucki is the default because cork's grain hides fine detail anyway. You can switch dither on any image in Easy Mode. How Ultra measures up against other tools is on the comparison page, with the method.
Choosing one
Start with the preset's default. If a portrait looks too soft from a distance, try a Look such as Punchy before you change the dither. Change the dither when you want a specific texture: Atkinson for bold, poster-like pet portraits, Bayer for an even graphic pattern, Threshold for line art. Serpentine scanning, where the direction alternates on every row, is used to reduce directional worm artifacts in error diffusion.
Your laser's DPI matters as much as the dither. Dots that overlap merge into blotches. Check your setting with the DPI calculator.
Step by step
Open the photo in Easy Mode
Drop the photo, crop it to your blank and pick the material. The preset picks a default dither.
Look at the default first
Check the result with the magnifier (press L). Most photos need no dither change.
Try a Look before a new dither
Punchy, Soft portrait or Max detail change tone and sharpness, which often fixes what looks like a dither problem.
Switch the dither
Pick another dither from the list. The preview updates, then renders in full quality when you stop changing settings.
Compare on material
Use the On material tab to see the dots in the surface and mark colours before you download.
Questions
Short, specific answers. Every material and tool is in the guides.
- What is the best dither for laser engraving photos?
- For portraits and pets, start with Ultra, the default on every preset except cork. It places dots to stay as close to the photo as it can. Jarvis and Stucki are good fast alternatives.
- Why does my engraving have worm-like lines?
- That is a known artifact of simple error diffusion, mostly Floyd and Steinberg in smooth areas. Try Jarvis, Stucki or Ultra.
- Should I let my laser software dither the image?
- Not twice. Our files are already dithered, so set the image mode in your software to threshold or pass-through. The LightBurn project export does this for you.
- When should I use No dithering?
- Only when your laser engraves in grayscale with variable power, or for 3D engraving. In normal on or off mode, a grayscale file loses its tones.
- Why is Ultra slower?
- It tests many dot moves and keeps the ones that bring the result closer to the photo. That takes a few seconds per image. The app shows a fast preview while it works.
- Does the dither change by material?
- The preset sets it: Ultra on nine materials and Stucki on cork. You can change it on any image.
Keep going
Start with your own photo.
One Click, Easy Mode and Batch run in your browser. Sign up free with an email link, no card.
Free account, email link, no card.